Some devices feel like they don’t want to be opened. The DK380C4.0-H8 is one of those. No obvious screws. Tight seams. Just enough resistance to make you question whether you’re about to break something expensive.
But here’s the thing — it can be opened cleanly if you know where to look and how to approach it. Rushing is what causes damage, not the device itself.
Let’s walk through it like someone who’s opened a few too many stubborn gadgets.
First, Understand What You’re Dealing With
Before you grab a screwdriver and start poking around, pause for a second.
The DK380C4.0-H8 model (regardless of the exact product type it’s built into) is typically housed in a snap-fit enclosure with hidden fasteners. That means:
- Some screws may be concealed
- Plastic clips are doing most of the holding
- Excess force is your enemy
If you’ve ever cracked open a router, tablet, or small embedded system, the feel is similar. Slight flex. Tight tolerances. Easy to scar the casing if you slip.
Now imagine trying to pry open a sealed lunchbox without knowing where the latch is. Same idea.
Tools Matter More Than You Think
You can open it with a random screwdriver and a kitchen knife. People do. People also regret it.
A basic setup makes the process smoother:
- A plastic pry tool or spudger
- A small Phillips screwdriver (sometimes Torx, depending on variant)
- A thin plastic card (old credit card works surprisingly well)
Metal tools are risky around plastic seams. They leave marks and can snap clips if you twist too hard.
A quick example: I once used a flathead screwdriver on a similar enclosure thinking “I’ll be careful.” One slip later, there was a permanent gouge right across the edge. The device still worked, but it looked like it had been in a fight.
So yeah — plastic tools are worth it.
Finding the Hidden Entry Points
Here’s where most people get stuck.
You look at the device and think: Where does this even open?
Start by inspecting the edges closely under good light. Rotate it slowly. You’re looking for:
- A faint seam line running around the body
- Slight gaps near corners
- Rubber feet or labels that might hide screws
On many DK380C4.0-H8 housings, screws (if present) are often tucked under:
- Sticker labels
- Silicone feet
- Battery compartments
If you see a label that looks slightly raised or imperfectly aligned, there’s a decent chance something’s hiding underneath.
Don’t rip it off aggressively. Peel slowly so you can reattach it later if needed.
The First Separation — Take It Slow
This is the moment where patience pays off.
Insert your plastic pry tool into the seam — gently. Not forcing it. Just enough pressure to feel where the clips are.
You’ll usually hear a soft click when a clip releases. That’s good. That means you’re doing it right.
Move along the edge gradually. Don’t try to pop the entire case open from one side. That’s how clips snap.
Think of it like unzipping a tight jacket — you don’t yank it open all at once.
A small trick that helps: once you’ve opened a tiny gap, slide a plastic card into it. This keeps the section from snapping back while you work on the next part.
Dealing With Stubborn Clips
Some clips will refuse to cooperate. That’s normal.
Instead of forcing them, change your angle slightly. Sometimes approaching from a corner instead of a straight edge makes all the difference.
Another thing — apply gentle upward pressure while prying. Not just outward. Clips often release more easily when tension is applied in the right direction.
If something feels too stuck, stop and reassess. There’s probably a hidden screw you missed.
That’s not a guess. It happens all the time.
Opening the Case Without Breaking Internals
Once the clips are released, don’t just pull the halves apart.
Pause.
Many DK380C4.0-H8 units have internal cables connecting both sides — usually thin ribbon cables or small connectors.
Open it like a book, slowly. Peek inside before separating fully.
If you see a cable:
- Locate the connector
- Disconnect it carefully (usually a small latch or friction fit)
Pulling the case apart without checking is one of those mistakes people only make once.
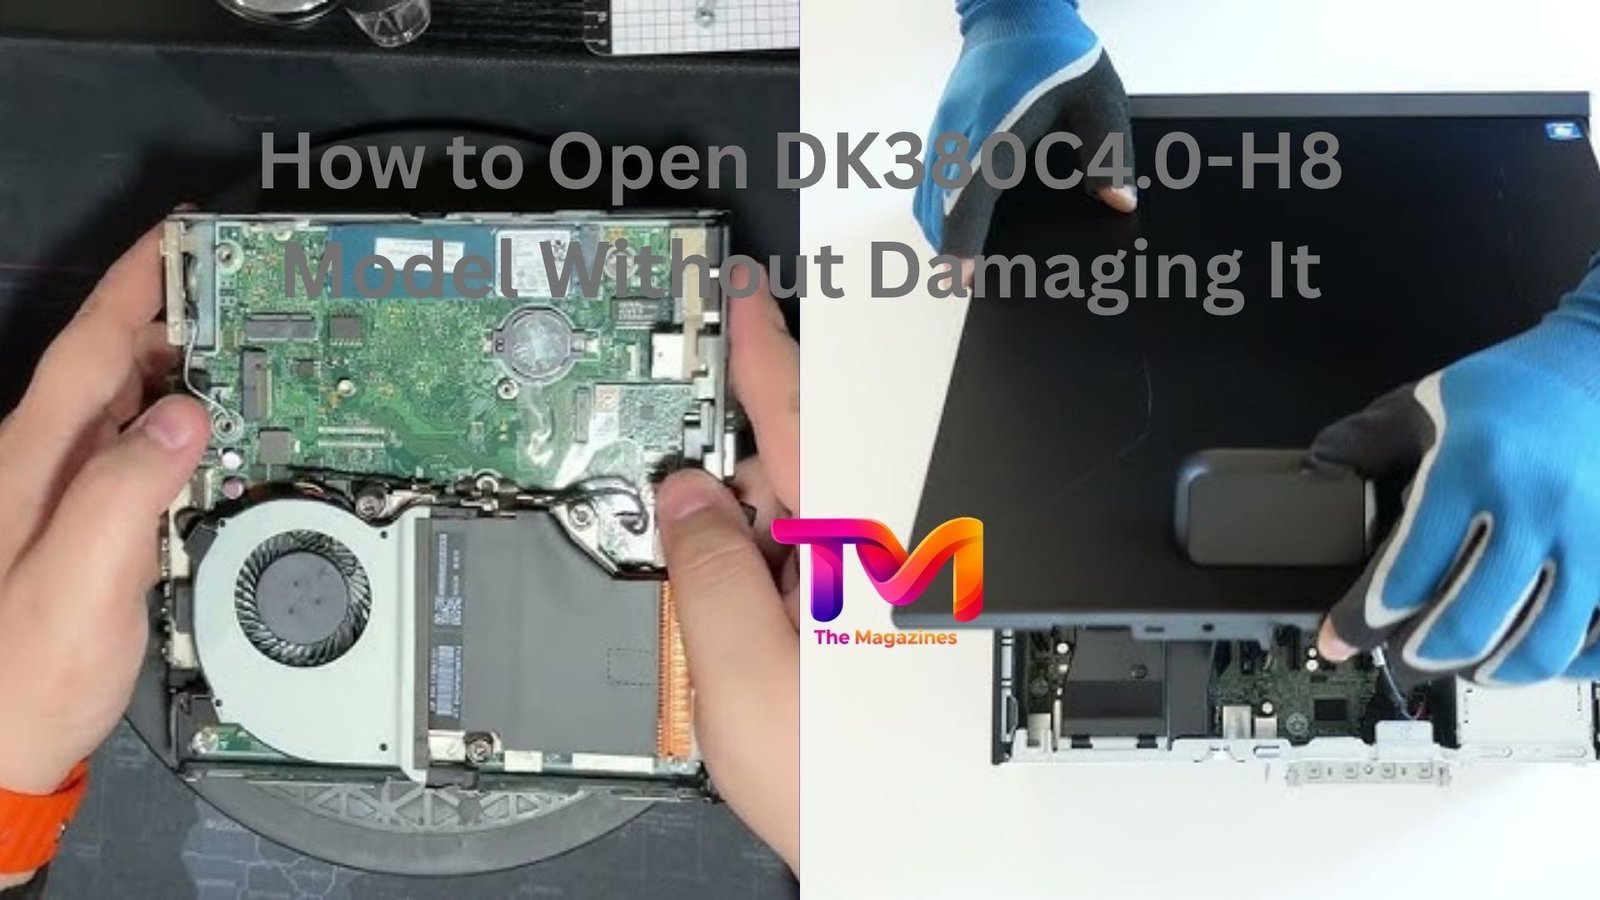
What You’ll See Inside
The internal layout is typically compact but logical:
- A main PCB (printed circuit board)
- A battery or power module (if portable)
- Possibly a small cooling element or shielding
- Connectors for ports and sensors
Nothing too exotic, but everything is tightly arranged.
Avoid touching components unnecessarily. Static discharge is real, even if it doesn’t feel dramatic.
If you’re opening it for repair or inspection, focus on your goal instead of poking around randomly.
Reassembly Is Where People Slip Up
Opening the device is only half the story. Getting it back together cleanly is just as important.
Before closing:
- Make sure all connectors are properly seated
- Check that no cables are pinched
- Align the casing carefully before pressing
When snapping it back:
Press along the edges gradually, the same way you opened it. You’ll hear the clips re-engage.
If one section won’t close, don’t force it. Something inside is likely misaligned.
A quick real-world scenario: someone once told me their device “wouldn’t close anymore.” Turned out a cable was sitting slightly out of its channel. A 2mm shift was enough to block the entire case from sealing.
Tiny details matter here.
Common Mistakes That Cause Damage
A few patterns show up again and again:
Using too much force
This is the big one. If it doesn’t open easily, there’s always a reason.
Skipping the inspection step
Missing hidden screws leads to cracked plastic. Every time.
Using metal tools aggressively
Scratches are cosmetic, but broken clips aren’t.
Pulling the case apart too quickly
Internal cables don’t forgive that mistake.
Not keeping track of parts
Even a single misplaced screw can cause alignment issues later.
None of these are complicated errors. They’re just easy to make when you’re impatient.
When It Feels Like It Won’t Open
Sometimes, even when you’re doing everything right, the device just resists.
That’s usually because:
- There’s still a hidden screw
- A clip is positioned differently than expected
- The seam is tighter on one side
Step away for a minute. Seriously.
Come back with fresh eyes and re-check everything. You’ll often spot what you missed the first time.
It’s surprisingly common.
Is It Worth Opening Yourself?
Let’s be honest — not every situation calls for DIY.
If you’re opening the DK380C4.0-H8 for:
- Simple inspection
- Cleaning
- Minor fixes
Then yes, it’s usually manageable.
But if it involves delicate repairs or soldering, the risk goes up quickly. One slip can turn a fixable issue into a dead device.
There’s no shame in stopping halfway if something feels beyond your comfort level.
Final Thoughts
Opening a DK380C4.0-H8 model isn’t about strength or special tricks. It’s about patience, observation, and controlled movement.
Take your time with the seams. Respect the clips. Double-check before pulling anything apart.
Most people who damage these devices aren’t unlucky — they just move too fast.
If you approach it calmly, you’ll find that it opens in a way that actually makes sense. And once you’ve done it once, the second time feels almost obvious.


Leave a Reply